Preparing Hose Assemblies with NPT Ends for Leak Testing
Note: To print this bulletin on how to prepare NPT ends for leak testing, please click here.
How to Prepare NPT Ends for Leak Testing
Penflex hose assemblies undergo an air under water test followed by a hydrostatic test to ensure there are no leaks and to confirm the structural integrity of the welds.
To perform these tests, special fittings, or “closures,” are needed to create a temporary seal. It is through these fittings that the test media, whether gas or liquid, will flow.
The minimum working pressure of these fittings must meet or exceed the assembly test pressure. For instance, the test pressure in an air under water test for hose assemblies ¼” – 4” in diameter is 75 PSI. The test fittings used must have a minimum working pressure of 75 PSI.
Closures for hydrostatic testing must be stronger given the higher pressures used in these tests which, by default, is 1.5 times working pressure for an assembly with one braid layer. For instance, 4” P4 hose has a working pressure of 300 PSI. Therefore, the hydrostatic test pressure will be 450 PSI and the test fittings used must meet this pressure requirement.
Naturally any test fittings used for a hydrostatic test will work for an air under water test, but the reverse is not necessarily true.
Risk of Damage to End Fittings
Threaded pipe nipples, as well as unthreaded pipe, are susceptible to damage from wrenches during the application of the test fittings.
This is no inevitable result though! A good set-up and careful use of force will ensure no damage occurs.
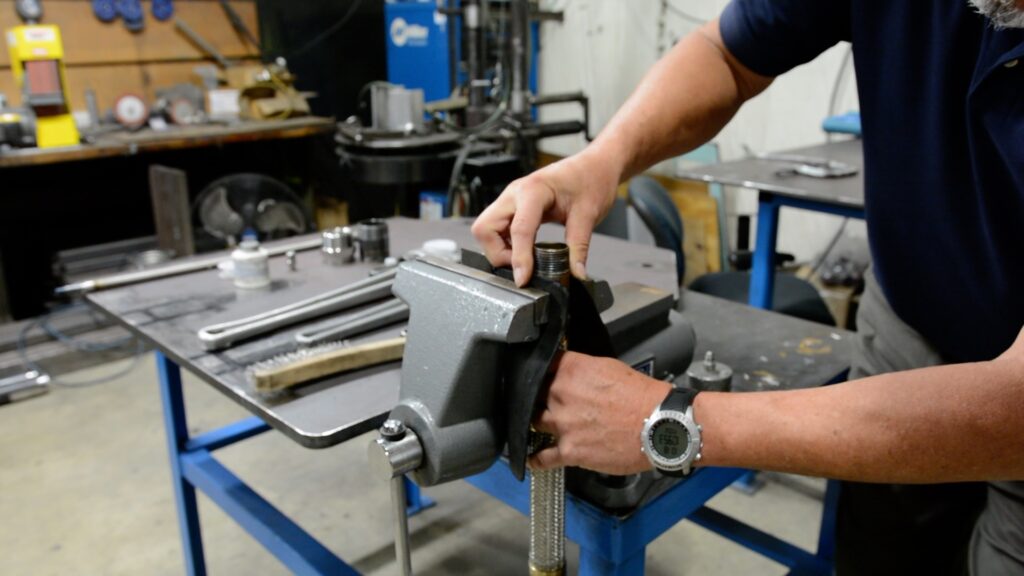
Attaching the Test Fittings
The process below is designed to minimize contact with the braided section of the hose.
- Ensure the threads are clean. Use a brush to remove any dirt or debris that could affect the ability to achieve a leak-tight seal.
- For smaller diameter hoses, a vise grip will keep the hose stable when screwing on the test fittings. Situate the hose in a piece of rubber insulation to protect the outside of the toe nipple before tightening the vise. The vise should never press against the braided hose.
- Apply a layer of thread sealing to the top half of the threads followed by Teflon pipe tape, wrapped in a clockwise direction. The combination of sealing and tape delivers a leak tight seal without requiring excessive tightening that could deform assembly fitting threads.
- Screw on the test fitting using the right size wrench, being careful not to overtighten. There is no need to bury the threads all the way into the fitting.
- Repeat on the other end of the assembly.
Pipe Thread Alternative
A hex nut is an alternative end fitting that is less susceptible to damage.
Note: To print this bulletin on how to prepare NPT ends for leak testing, please click here.